Cheeseburger Sliders
Make juicy and easy Cheeseburger Sliders in 30 minutes. A quick game day appetizer or comforting family meal with no grilling required!
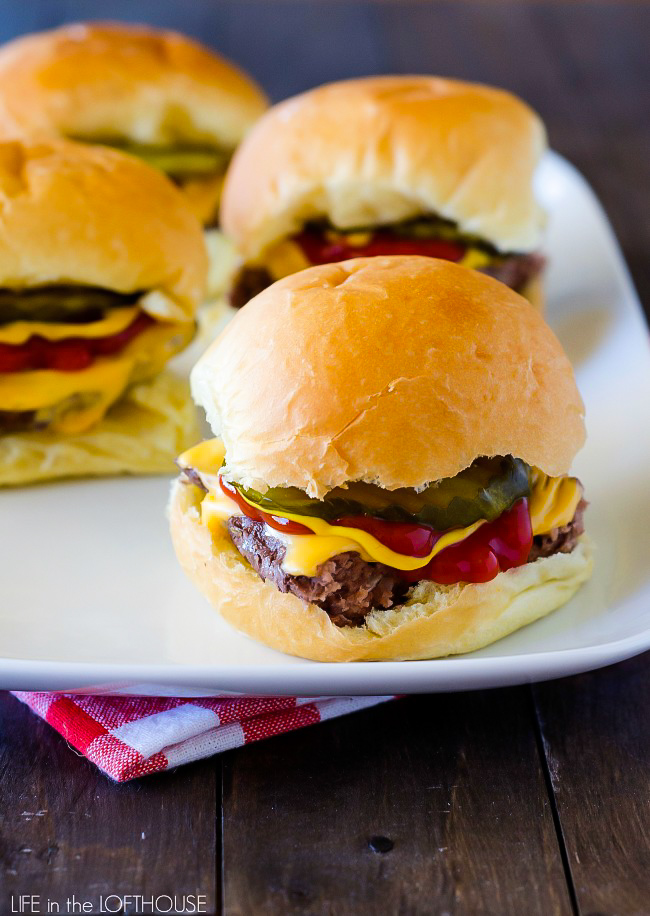
If you’re looking for the ultimate comfort meal or easy party appetizer, these Cheeseburger Sliders are it. They’re everything you love about a classic cheeseburger: juicy beef, melted cheese, soft rolls, and all of your favorite toppings, in bite-sized form. These easy burger sliders have quickly become a family favorite in our home because they’re ridiculously simple to make and unbelievably delicious. Seriously, once you try them, you’ll be making them on repeat.
CHEESEBURGER SLIDERS
What makes this recipe so popular is how effortless it is to prepare. Instead of shaping individual burger patties, you simply press the seasoned ground beef into a baking dish, bake it all at once, and slice it into perfect portions. It’s fast, mess-free, and ideal for busy weeknights when you are short on time but are still craving your favorite takeout burger. You can use your favorite dinner rolls for this recipe, like my French Bread Rolls, for an extra bakery-style twist, and even Hawaiian rolls for a slightly sweeter bite. In just about 30 minutes, you’ll have a full tray of hot and cheesy sliders ready to serve without even touching a grill. With everything baked in one dish, you get fewer pans, less mess, and an easy cleanup, making this recipe as convenient as it is delicious.
Find my expert tips on how to make homemade cheeseburger sliders in the oven below! Don’t forget to tag me in all of your creations @lifeinthelofthouse on Instagram and Facebook. Let’s stay connected. ❤️
Why You’ll Love This Cheeseburger Sliders Recipe:
- Quick & Easy: These sliders are great for busy weeknights when you need dinner fast and are on the table faster than takeout.
- Cheesy & Hearty: All the classic cheeseburger flavors the whole family loves, but in slider form.
- No Individual Patty Rolling Required: Skip forming and shaping burger patties with this oven-baked burger recipe.
- Great For Any Occasion: These sliders can easily be scaled up to serve as a game day appetizer, quick weeknight dinner, parties, and a fun finger food for sharing.
Ingredients
- 2 pounds lean ground beef
- 1 Tablespoon dried minced onion OR 1/2 cup chopped fresh onion
- 1 teaspoon seasoning salt
- 1/2 teaspoon black pepper
- 6 slices of American cheese
- 12 dinner rolls
Instructions
Preheat oven to 375° F.
In a large bowl, combine hamburger meat, onion, seasoning salt, and pepper. Mix to combine. Press mixture evenly in the bottom of an un-greased 9×13 inch baking dish.
Bake, uncovered, for 25 minutes or until the meat is no longer pink in the center. It’s normal for the meat to shrink a little.
Remove from the oven and then carefully pour out the grease in the pan. Place cheese slices over the top of the meat. Place back in oven for 2 minutes or until cheese is melted.
Cut the meat into 12 equal-sized squares. Place each square of meat in the center of the dinner roll. Serve with your favorite cheeseburger toppings: ketchup, mustard, pickles, etc. Enjoy!
Servings
Serves 6.
Storage and Reheating
Store leftover cheeseburger sliders in an airtight container in the refrigerator for up to 3-4 days. For best results, let them cool completely before storing to prevent sogginess. To reheat, place individual sliders in the microwave for 30-60 seconds or warm a batch in the oven at 325°F until heated through. To freeze, wrap each slider tightly and place them in a freezer-safe bag or container for up to 2 months. Thaw overnight in the refrigerator before reheating.
Holly’s Tips for The Best Cheeseburger Sliders:
- Use High-Quality, Lean Ground Beef: Choose lean (85-90%) ground beef to reduce excess fat, grease, and helps the sliders hold together better and prevents soggy rolls.
- Don’t Skip The Onion: Fresh chopped onion adds extra texture and a juicier bite.
- Press Meat Evenly: Spread the beef in an even layer across the entire pan, and this ensures all sliders cook evenly and slice cleanly.
- Let It Rest Before Cutting: Allow the meat to sit for a minute or two before slicing, and this helps the juices settle and keeps squares intact.
- Make It Your Own: Add classic toppings like ketchup, mustard, and pickles. You can also try adding lettuce, tomato, or special sauce for extra flavor. Great for letting everyone build their own slider.
Frequently Asked Questions:
Yes! You can fully bake the beef layer ahead of time, then store it in the refrigerator. When ready to serve, reheat the meat, add the cheese, and assemble the sliders for the freshest taste.
American cheese is recommended because it melts smoothly and gives that classic cheeseburger flavor. However, you can substitute cheddar, provolone, or your favorite melting cheese if preferred.
To prevent soggy sliders, drain the grease after baking the meat, and consider lightly toasting the rolls before assembling. Serving immediately after assembling also helps maintain texture.
To make Cheeseburger Sliders healthier, start by using extra-lean ground beef (90-93%) or ground turkey to reduce fat while keeping plenty of protein. You can also reduce calories by using whole wheat or whole grain slider buns, or even lettuce wraps for a low-carb option. Cut back slightly on cheese or use a reduced-fat cheese if desired, and add fresh toppings like lettuce, tomato, pickles, and onions for extra flavor and nutrients.
To make Cheeseburger Sliders gluten-free, swap the dinner rolls for your favorite gluten-free slider buns or gluten-free dinner rolls. The beef mixture, cheese, and seasonings are naturally gluten-free, so no other major changes are needed. Just be sure to double-check that your seasoning salt and any toppings or sauces are certified gluten-free if needed. Assemble and bake the beef as directed.
Similar Recipes
Craving something similar? Try my Western Cheeseburger Sliders.
Wanting something a little different? Make my Cheeseburger Lettuce Wraps.
Can’t get enough of cheeseburger recipes? Try these highly-rated recipes next: Cheeseburger Bowls with Copycat Big Mac Sauce, The Best Ever Cheeseburgers, and In-N-Out Cheeseburger.
Have you made this Cheeseburger Sliders recipe? 🍔
Leave a review, and don’t forget to tag me in your creations on Instagram and Facebook! @lifeinthelofthouse! #CheeseburgerSliders #LifeInTheLofthouse
Cheeseburger Sliders
Ingredients
- 2 pounds lean ground beef
- 1 Tablespoon dried minced onion or 1/2 cup chopped fresh onion
- 1 teaspoon seasoning salt
- 1/2 teaspoon black pepper
- 6 slices american cheese
- 12 dinner rolls
Instructions
- Preheat oven to 375° F.
- In a large bowl combine hamburger meat, onion, seasoning salt and pepper. Mix to combine. Press mixture evenly in the bottom of an un-greased 9×13 inch baking dish.
- Bake, uncovered for 25 minutes or until meat is no longer pink in center. (It’s normal for the meat to shrink a little)
- Remove from oven and then carefully pour out the grease in the pan. Place cheese slices over the top of meat. Place back in oven for 2 minutes or until cheese is melted.
- Cut meat into 12 equal size squares. Place each square of meat in the center of dinner roll. Serve with your favorite cheeseburger toppings! (Ketchup, mustard, pickles, etc)
WANT TO SAVE THIS RECIPE FOR LATER?
PIN IT TO YOUR FAVORITE PINTEREST BOARD! 📌
WANT TO SAVE THIS RECIPE FOR LATER?
Pin it to your favorite Pinterest board so you have it when you're ready!


Hi, love the blog! Do you have any problems with the sliders being too greasy since there is no way to drain the meat?
When the meat was done cooking, I carefully poured the grease out. Then added the cheese. So they were not greasy at all 🙂
Great! Thank you, an excellent way to make sliders!
They are so easy and so good! Hope you love them, too 🙂
Wondering about making these about 4 or 5 hours ahead, sticking them in the fridge and then warming in the oven before serving. Do you think it would make the bun all soggy? I will definitely be trying these soon, but have a “thing” this weekend that they would be perfect for, but would have to prep them ahead and take them with me. Looking forward to your thoughts!
Katha, I’m not sure about making them ahead. We had a few leftover that I stored in the fridge, when we reheated them in the oven the rolls got really crispy and hard. I think fresh is best with these 🙂
Just make sure you wrap them in foil when warming them in the oven. Just like fresh made.
You can prepare the meat ahead of time and put it in the fridge. Then the day you want to serve them heat the meat and then add the cheese to it. This will keep the bread fresh and not hard and crispy. Still a little prep on the day of serving, just not as much of a mess to clean.
I was thinking of using this idea for a party. Thought about just cooking the meat and draining the grease then putting them in the fridge overnight and reheating the next day (before the party) in the pan while you melt the cheese. I think this would solve the hard rolls issue don’t you?
These were great, love the idea of baking them, way easier clean up.
These were so good! Super easy and tasted better than the ones that end up overdone on the grill.
For those of you asking about making ahead of time… I do! Then I re-heat in the crock pot with au jus on them to keep them juicy and flavor-filled. They’re delicious!!!
Tried these last night and they were great!
If I wanted to cut this recipe in half, what size pan would you suggest to bake the hamburger in?
These were yummy! I used a different slider recipe for New Year’s Day, which didn’t turn out so well. I like how the meat and buns are prepared separately, to prevent over-cooking. Thank you for this recipe!
Hi Holly! I made these for dinner tonight and they did not disappoint! Once again you hit the mark. You have awesome recipe ideas and I use them frequently, they always get rave reviews from my family. Thanks!!
I’m so glad to hear they were a hit! And thank you so much for the kind compliment. It means a lot! 🙂 xo
This RECIPE was great. It was QUICK and easy. I did add a sPlash of worcestershire sauce To it, but im sure it would Be fine without It. My two teenage grandsons gave it a thumbs up. Thanks for sharing