Fabulous French Bread
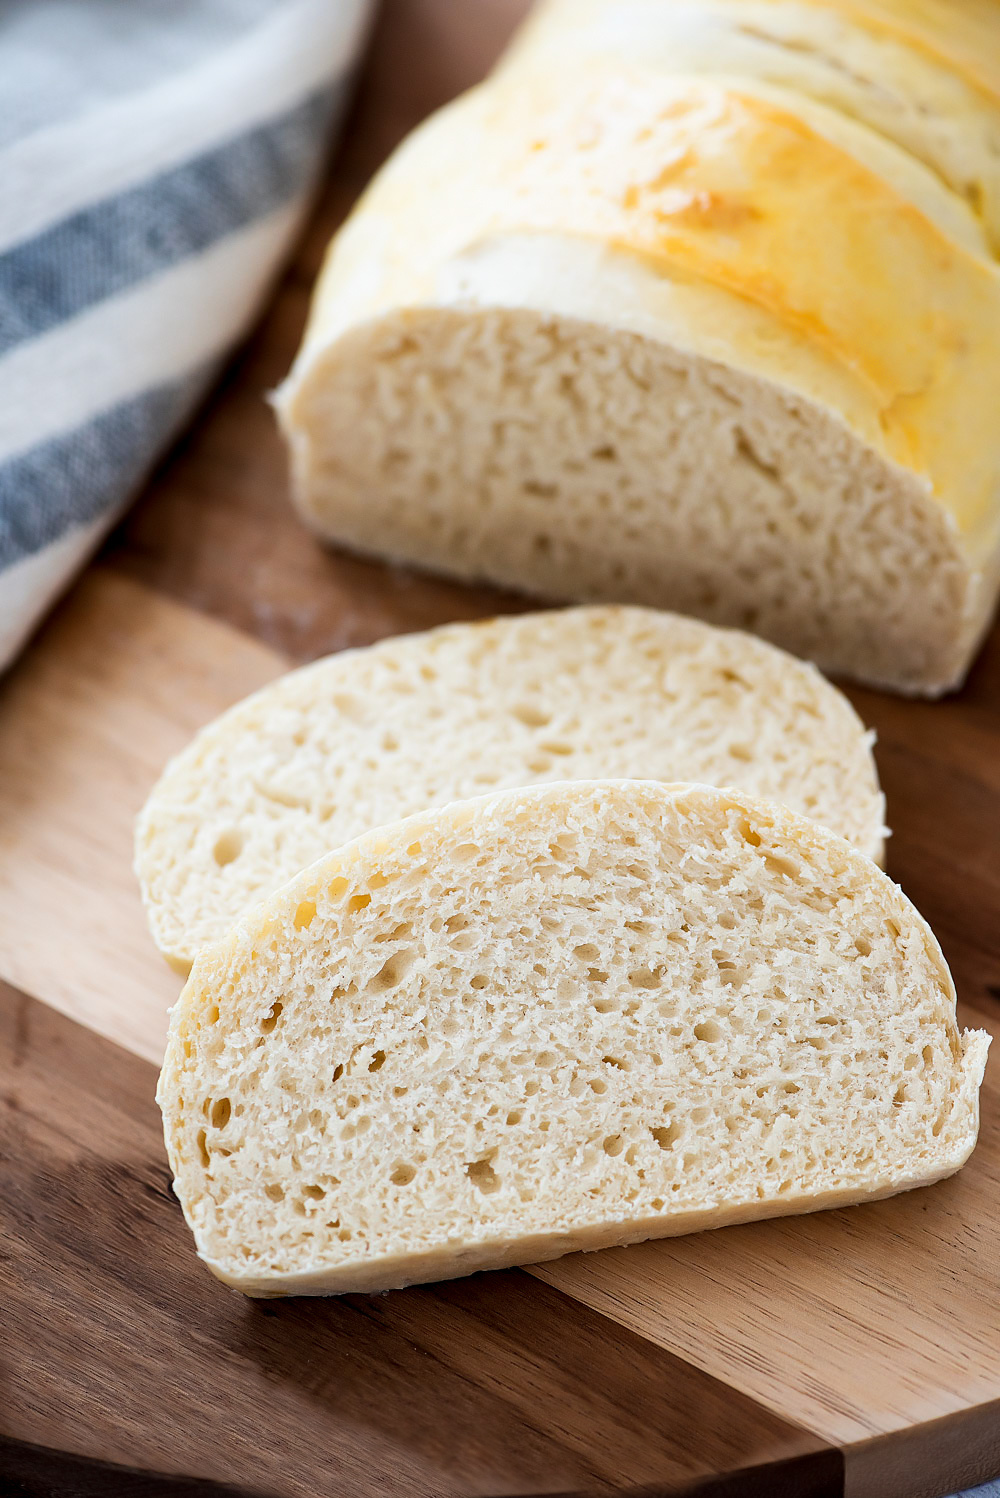
Fabulous French Bread is a delicious homemade bread that is soft and fluffy on the inside with a golden crust on the outside. In just an hour and a half, you can have 3 fresh loaves of bread ready to be devoured!
To me, one of life’s greatest pleasures is being able to bake loaves of delicious bread from the comfort of your own home. There’s just something so incredible about the aroma of homemade bread wafting through your house, and it always reminds me of why I love baking.
This recipe requires under an hour of prep time and a 20 minute bake time. In just over an hour you can have 3 warm loaves of French bread freshly baked and cooling on your counter!
Once you try this Fabulous French bread recipe it’ll forever become your go-to. It is so easy to make and the only kneading required is what the mixer does for you.
You also don’t have to wait and let the dough rise for a long period of time. The only waiting necessary is two 5 minute rests after mixing the dough, then another 15 minutes once it’s placed into the oven. This bread seriously is the best, promise! 🙂
FREEZING FABULOUS FRENCH BREAD
This amazing bread freezes very well. Once the loaves have cooled down to room temperature, wrap them up in plastic wrap then place them into a ziplock freezer-safe bag. Store for up to 2 months in the freezer. When you’re ready to use them, set them out at room temperature until thawed.
STORING
If left out at room temperature, it can last up to 3 to 4 days. Just be sure to keep it covered in plastic wrap, or in a ziplock bag if you leave it out.
HOW TO SERVE FABULOUS FRENCH BREAD
Here are a few ways I like to enjoy this Fabulous French Bread:
- Butter: there’s nothing better than slathering on some creamy butter on your bread slices. You don’t just have to do plain butter though, cinnamon butter, garlic herb butter, strawberry butter, or apple butter would all be delicious options.
- Honey or Jam: this is perfect for when you’re craving something a little sweet. Drizzle on some honey or slather on some jam or jelly (any flavors will do) and you’ll be in heaven!
- As a side: a tasty side dish for any soups! A few delicious options would be chicken gnocchi soup, broccoli cheese soup, or creamy chicken noodle soup! Another classic option would be to serve with your spaghetti dinners!
- For a sandwich: this bread is amazing for sandwiches! You could try making it into a chicken Caesar sandwich, club sandwich, or even use it for your beef brisket sandwiches!
- For pizza: yes, that’s right! You can use it for some tasty French bread pizza! This taco French bread pizza is a family favorite!
HELPFUL TIPS
A few tips to help make your bread-making even easier!
- Make sure you don’t over knead your bread! How I have it in the recipe card is all the kneading you need, which is what the mixer does for you. Over kneading will result in tough and chewy bread.
- For an even crispier crust, place a pan of water into the oven with the bread when you bake it!
- For a softer crust, brush on some melted butter right when it comes out of the oven.
ALTERNATIVES
A couple different options:
- Yeast: you can use either instant or traditional yeast in this recipe, either one will work fine.
- Butter: if you don’t have shortening, you are more than welcome to use butter. It works just as well.
CAN YOU USE BREAD FLOUR?
I would recommend against it. Bread flour has too much protein meaning it will suck up all of the water and leave you with a dry bread that is pretty tough.
If you like this recipe you’re bound to love these similar ones:
- French Bread Rolls: soft and delicious rolls that are perfect for any occasion!
- Easy Artisan Bread: a must-make bread that is soft and delicious on the inside and golden and crusty on the outside!
- Stuffed French Bread: a cheesy and flavorful ground beef mixture stuffed between flaky and crispy French bread.
- Chicken Stuffed French Bread: a creamy shredded chicken mixture filled with ranch dressing, loads of cheese, and green onion placed in the middle of crispy French bread.
Fabulous French Bread
Ingredients
- 1 cup boiling water
- 1/3 cup warm water (105 degrees F.)
- 1 Tablespoon active dry yeast
- 2 Tablespoons granulated sugar
- 1 Tablespoon salt
- 1 Tablespoon vegetable shortening (I use butter-flavor Crisco)
- 1 cup cold water
- 6 cups all-purpose flour
- 1 large egg
Instructions
- Preheat oven to 170 degrees F. Fill a glass measuring cup with 1 cup of water. Place in microwave and heat for 3 minutes, or until water is boiling.
- In another glass measuring cup, fill it with 1/3 cup warm water. Sprinkle the 1 Tablespoon of yeast over the water. With a fork, stir yeast into the water until yeast is completely dissolved.
- Pour the sugar, salt and shortening into the bowl of your stand mixer. Using a fork, mash these ingredients together. Pour the 1 cup of boiling water over the shortening mixture in the stand mixer. Add the 1 cup of cold water, then pour in the yeast/water mixture.
- Add 3 cups of flour into the mixer. Using the dough hook, turn mixer on low speed. With the mixer still on, gradually add the remaining 3 cups of flour, 1 cup at a time. Once all 6 cups are in, turn speed to medium and allow the dough to mix for 6 to 8 minutes. The dough should be nice and elastic. (Be careful not to over-flour. I used all 6 cups, but would not use any more than that.)
- Once the dough is mixed, allow it to rest in the bowl for 5 minutes.
- Spray a large cookie sheet with non-stick spray. After the dough has rested in the bowl, dump it onto the greased cookie sheet.
- Take a sharp knife, spray it with non-stick spray, and cut dough into 3 equal pieces. Then let it rest again for 5 minutes. (These resting periods for the dough is needed, so please do it and be patient! It’s worth the wait.)
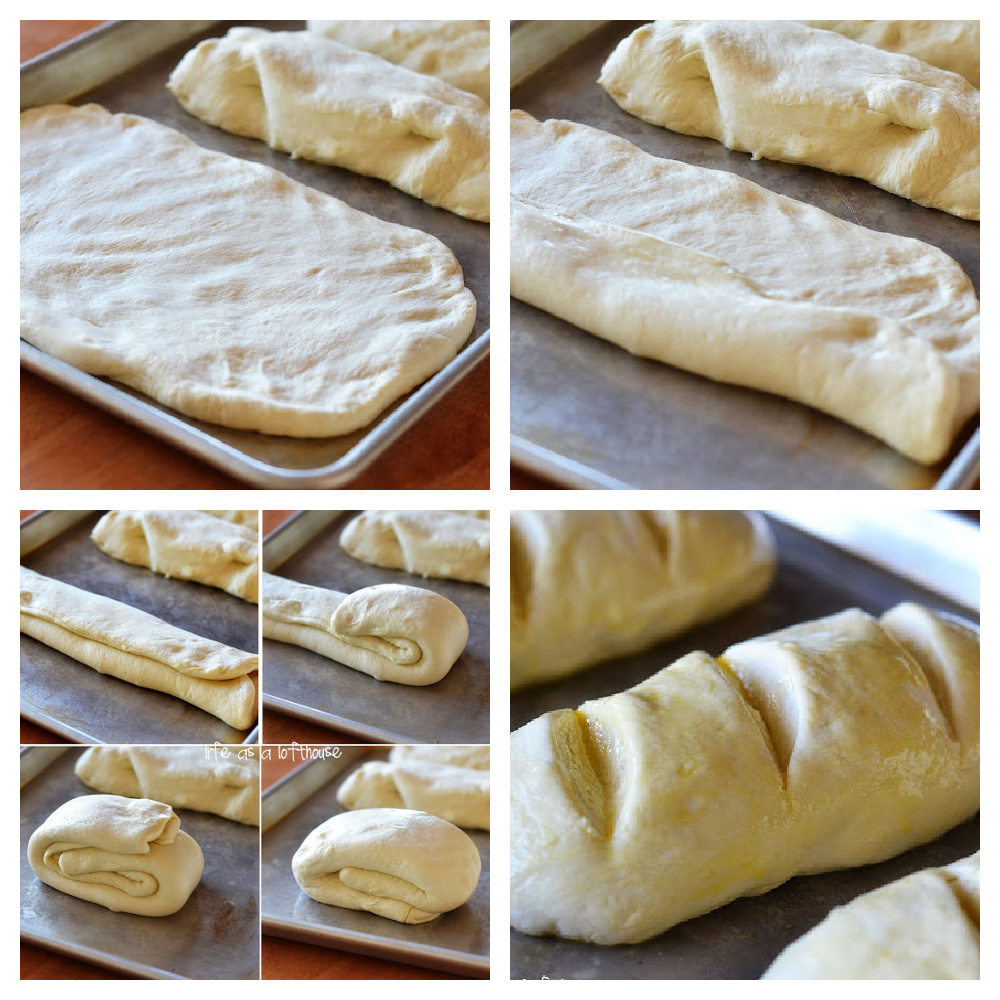
- To shape the dough before baking: Take one section of dough and spread it out into a rectangle. Just use your fingers, you don’t need a rolling pin. Fold one long end up over half of dough, then fold the other half over that one. Then fold each side up over each other, then turn the loaf over so it is seam side down.
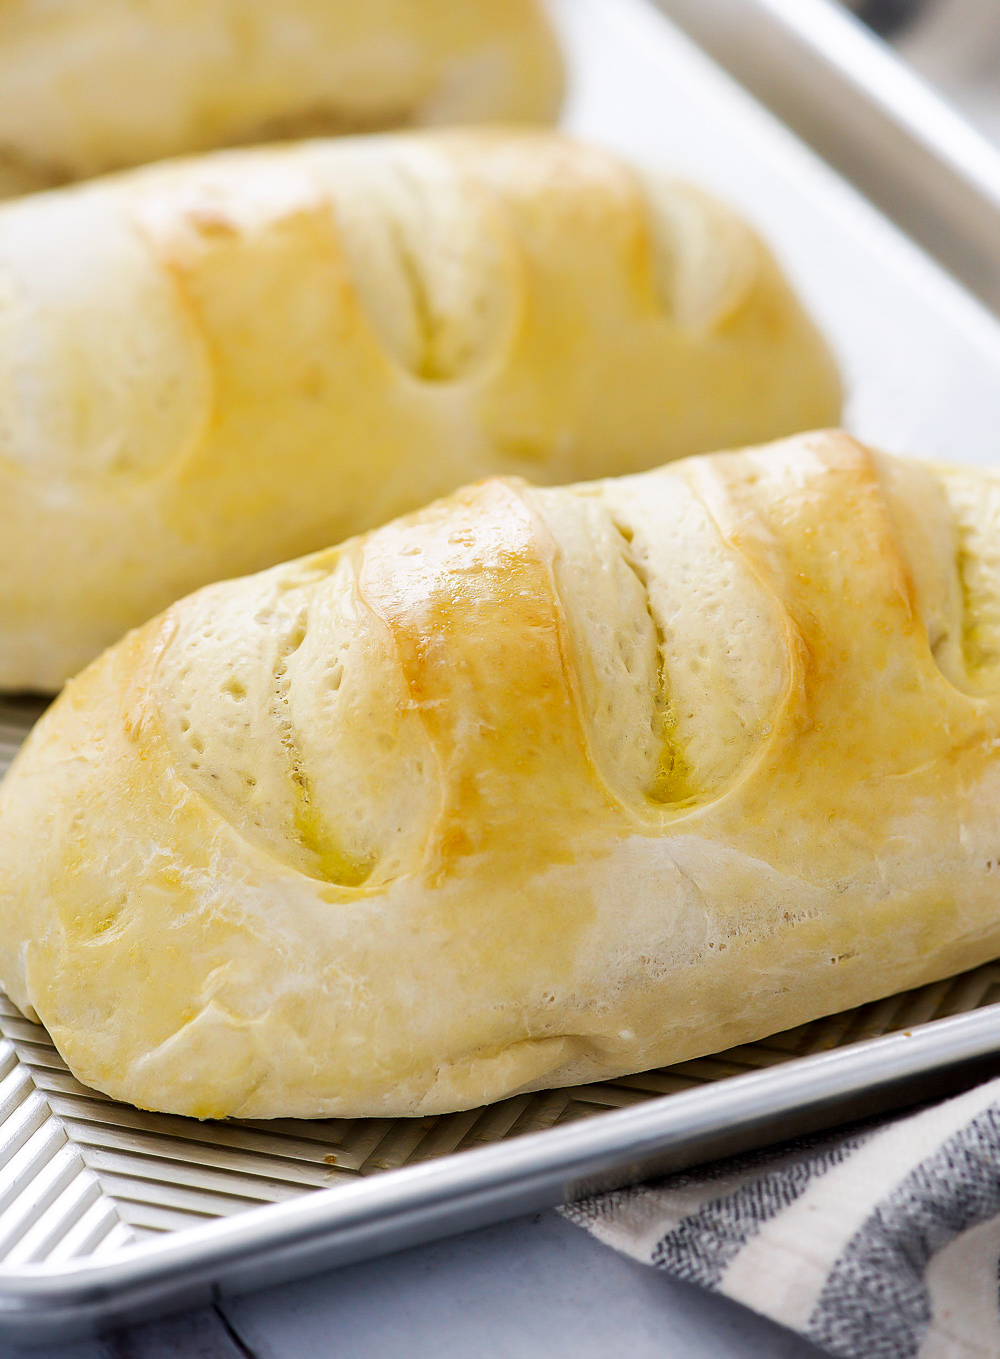
- Use your fingers to tuck seams down underneath the loaf and shape it. Repeat with the other 2 pieces of dough. Once all 3 sections of dough are shaped cut 3 angled 1/2 inch slits onto the tops of dough.
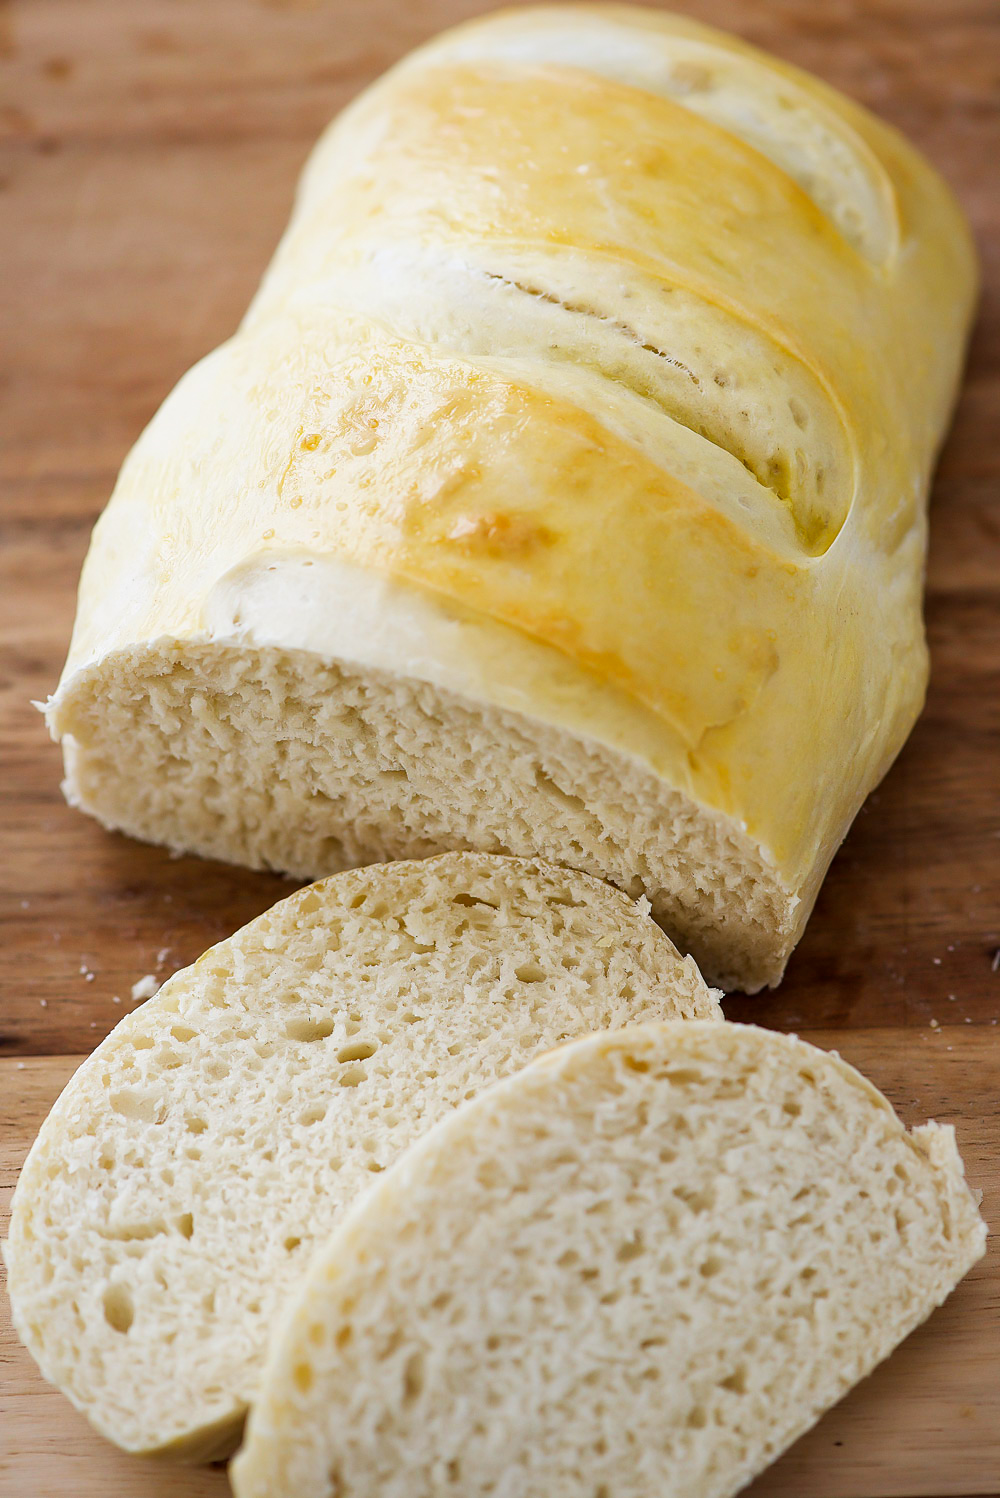
- Crack the egg into a bowl and whisk with a fork until frothy. Spread the egg over the tops of each loaf, making sure to get inside the slits.
- Place the loaves into the oven and let them rise for about 15 minutes (while the oven is on 170 degrees F.) Then turn oven up to 400 degrees F (while the loaves are still inside) and bake for 16 to 20 minutes, or until the tops are golden brown and crisp. Turn the oven down to 350 degrees F. and bake for an additional 10 minutes.
- Remove the loaves from the baking sheet and allow them to cool a bit before slicing them. Enjoy!
Notes
Below are step-by-step pictures on how to shape the dough:
WANT TO SAVE THIS RECIPE FOR LATER?
PIN IT TO YOUR FAVORITE PINTEREST BOARD!

WANT TO SAVE THIS RECIPE FOR LATER?
Pin it to your favorite Pinterest board so you have it when you're ready!


Does cutting the tops of the loaves serve any purpose or is is merely decorative? I’m going to make this today. Can’t wait to see how they turn out.
Do the cuts made on the top serve a purpose or are the merely decorative? I’m making this today. Can’t wait to see how they turn out.
I know with french bread the cuts are meant to be there. I have not made it without them, so I recommend it 🙂
All right, they just came out of the oven and they don’t exactly look like yours LOL. First of all, the dough was pretty sticky and a little difficult to work with, but I used all six cups of flour and followed your advice not to add more. They looked fine when they first went into the oven, but by the time they raised, the loaves sort of tilted over so the slits are on the sides rather than on top. They are also flatter than yours, but other than that, they look pretty good. I guess I need a little more practice – I’m used to making regular white bread in a bread pan.
I would dissolve the sugar in the warm water and then add the yeast to bloom, this may help with rising. Also, you may need to monitor the amount of flour based on the amount of himidity on the day you bake.
I kneaded it for 6 min. it was stickier than the pics and after baking, too dense. What did I do wrong? Did it need to knead longer?
Does this recipe multiply well? I work at a resort center and need to make enough loaves for 30 people and didn’t have time to try multiplying it before everyone came. I did get a chance to make a batch last week which turned out amazing and really hope to make it for dinner tomorrow 🙂
Not sure why but my bread was incredibly salty. Is it really supposed to be a tablespoon salt? Read the comments didn’t see anyone else complain. Really hate when I waste ingredients.
I’ve never thought or had anyone tell me it was too salty. If you feel that way you could try cutting the salt in half next time.
I would like to make this bread. Do you presift the flour prior to measuring?
Just wondering when you turn the oven up to 400 do you start the 15-20 minute cooking when it reaches that temp? And the pre heat is just extra?
Just start baking it right away. You don’t need to wait for it to reach 400°
fantastic recipe! My family loved it! The bread filled my entire home with the smell of fresh baked bread, nothing better than that on a cold winter day. Thank You!
I absolutely loved this recipe this was my first time baking anything with yeast so I love how you made it so easy with the pictures and everything. Everyone is loving this bread the only question I have (being inexperienced and all) is can you double this recipe?
Did you use quick rise yeaset or just regular active dry yeast? I used regualar both time and mine did not rise like yours. It only raised half the size of yours.
Just tried this and it turned out amazingly delicious! Accidentally had oven on too high for the start, so burned the bottom but it still tasted amazing and wonderful!!
This bread truly is fabulous! I made this after work today and had fresh, delicious bread in 2 hours. Your directions and pictures are so helpful. Thank you for a wonderful recipe!
Is active dry yeast the same thing as quick rise yeast? That’s what I used. Also I do not have a mixer so mixed by hand. They are in the oven now so I guess we will see if they work.
I have made this so many times…. and it’s always delicious! I have used various combinations of flours and fats, and it comes out amazing every time! Whole wheat, bread flour, white whole wheat… and coconut oil, butter, and crisco. I use whatever I have and this recipe is always delicious! SO SIMPLE! I don’t have a stand mixer… I do it all by hand in my big pyrex bowl. THANK YOU!!!
This looks great (it’s not a French bread though, as the typical French baguette, or loaf in France do not include egg or fat). 😉
I just made this bread and OMG is it great! Thank you for the recipe!
Have made this numerous times and it has always turned out really well. I am so happy to have found this recipe and have passed it on to all of my friends and to my family. Thank you so much for a wonderful and easy recipe!!!
What size cookie sheet did u use?
I believe mine is an 18-inch
Holly…once I have folded my dough, by “shape it” do you mean knead the folds out or just tuck in the seams?
To tuck the seams under.
Honestly shocked. I’ve always made bread very traditionally by blooming my yeast first and always using bread flour, so naturally this startled me. But with the reviews and trusting you, I went for it since my usual French bread recipe would have taken too long. These came out amazing and I now have two extra ones for tomorrow’s lunches. These may even be a little better than my usual recipe. I was scared since the last time I tried using all purpose flour in bread, it came out like flour paste and was crumbly after it baked (And that was only substituting half of the flour!) but really, no disappointment here.
Just made it for the first time and it was perfect! Soft and delicious.
I make this bread a lot!!! Easy. Quick! Yummy, especially right out of the oven. It freezes well. Thanks!
Thanks for this recipe. I love to bake bread and this is the easiest recipe I have found so far. Absolutely love it!
I made this recipe today. Substituted avocado oil. I found the dough to be sticky and it tended to spread out although it did rise. That being said, it tastes awesome, crispy chewy crust and soft texture on the inside, we love it and will definitely be using this recipe often
The first time I made it I used regular yeast and it didn’t work, it stayed folded up and hard and didn’t raise well. Ever since then I’ve used instant yeast and shaped my dough into the loaves with my hands instead of doing the folding thing and it turns out amazing and yummy. I cooked it on my smoker yesterday for a contest. We’ll see how I do.